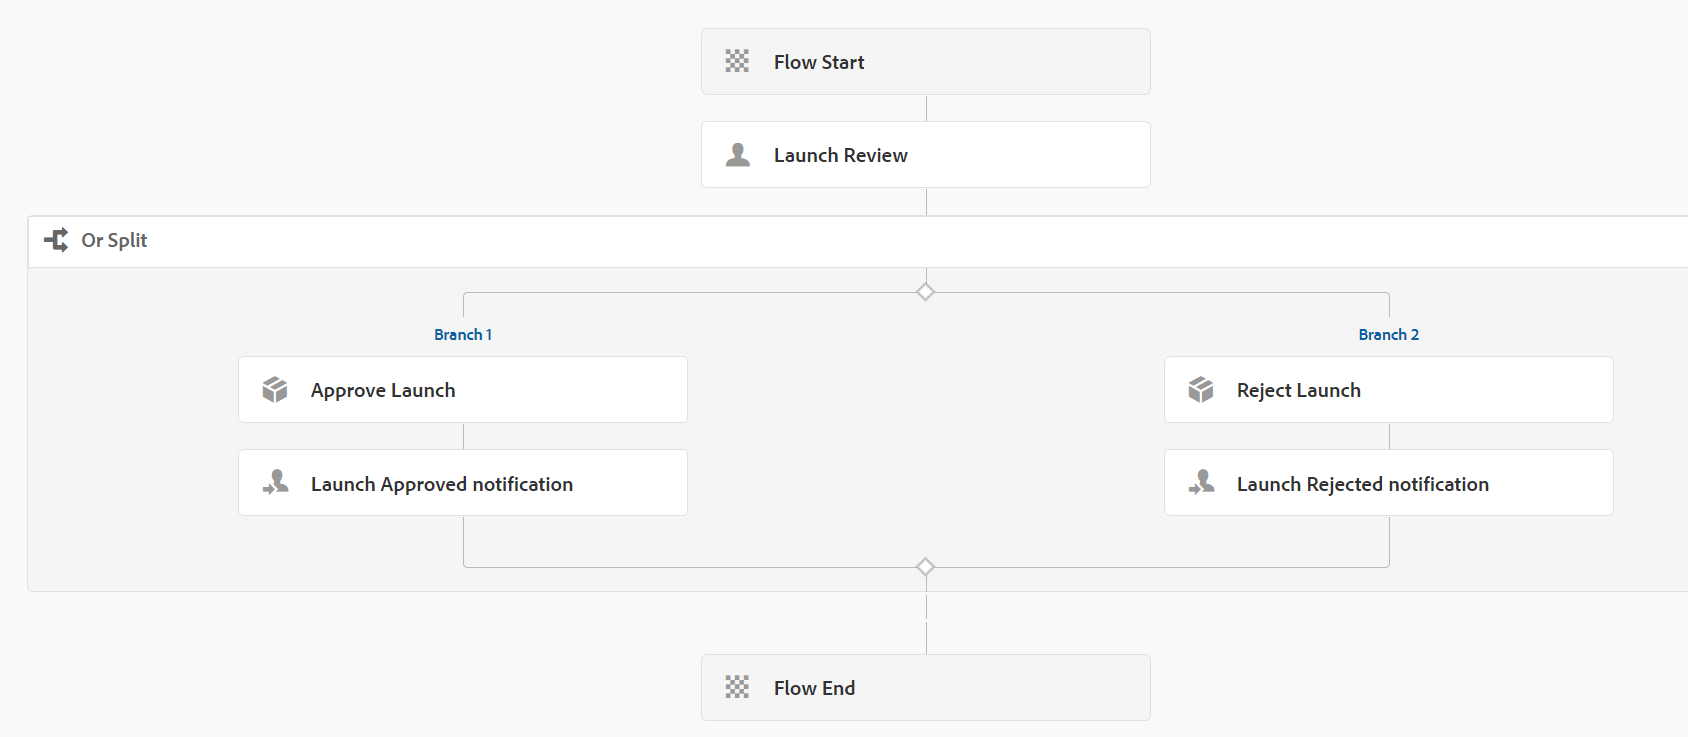
Configuring AEM launcher with an AEM workflow in AEM as a Cloud Service, you can follow these steps:
- Design the Workflow Model: Using the AEM Workflow Model Editor, design your desired workflow model. Define the steps, participants, and actions involved in the workflow. Ensure that your workflow model is complete and ready for execution.
- Access the Launcher Configuration: Log in to the AEM Cloud Service author instance and navigate to the “Tools” menu. From there, select “Cloud Services” and then choose “Workflow Launchers” under the “Operations” section.
- Create a New Launcher: In the Workflow Launchers configuration, click on the “+ New” button to create a new launcher.
- Configure the Launcher: Specify the properties for the launcher, including:
- Title: Provide a descriptive title for the launcher.
- Path: Define the content path or resource type that will trigger the launcher. For example, “/content/mysite” or “myproject/components/page”.
- Event Type: Select the event type that should trigger the launcher, such as “modify,” “create,” or “delete.”
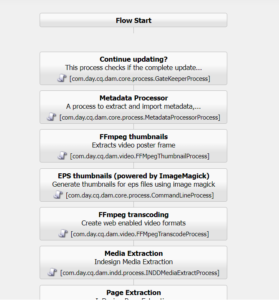
- Workflow Model: Choose the workflow model you designed in step 1 from the drop-down list.
- Save and Enable the Launcher: Save the launcher configuration and ensure that it is enabled by toggling the “Enabled” switch. Click on “Save” to apply the changes.
- Test the Configuration: Create or modify content that meets the trigger conditions set in the launcher configuration. The launcher should detect the event or condition and automatically initiate the associated workflow.
- Monitor Workflow Execution: Use the AEM Workflow console to monitor the execution of workflows. Track the progress of individual workflow instances, review task assignments, and access reports on workflow execution.